A Jewel In The Rough
It feels like the level of chaos at home has been running at medium to medium-high for a long time – the house has been under construction for several months and nearly everything is displaced. My man does renovations for a living, so projects at our house tend to be slower moving – he fits in the work at home between jobs, finding time here and there. And this isn’t even a fun project that I can help with or get into (tearing down walls to put in fresh new insulation means putting up heavy drywall, ugh). We’ve been shuffling from room to room upstairs, and I’ve had to find countless ways to reconfigure our cramped house as we compensate for being down a room.
Under normal circumstances, our house is already a little messy – it’s no big deal and I don’t mind that things aren’t perfect, but in its current state I find myself dreaming of tidying and organizing every room in the house, imagining how I will put things back together once all the dust settles (literally – there is a lot of dust from the plaster). Which leads me to my jewel in the rough – the treasure box I crafted a few weeks ago as a solution to my painfully disheveled jewelry storage system.
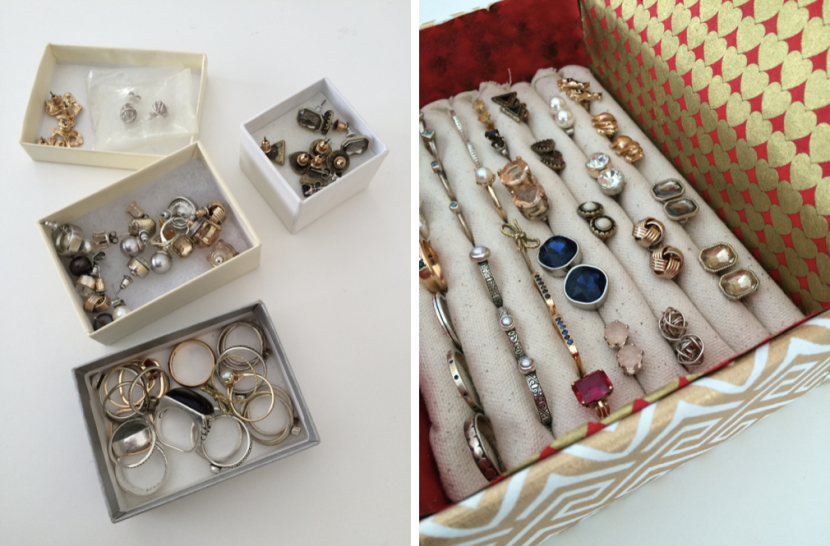
This project felt like an antidote to the chaos at home and came to me as I was thinking about how I want to rearrange my closet when it’s ready upstairs. All my rings and earrings have been living in a couple cardboard jewelry boxes for ages and I’ve always wanted a nice jewelry case to store and showcase them (trying to grab two of the same stud earrings from a tiny box early in the morning before coffee is awful), but all the options in stores never really suited my style. Naturally, I turned to Pinterest to get some ideas and inspiration for easy earring DIY storage, and immediately found a simple project: wrapping pencils in felt and sticking them in a box. This was doable, and I knew that I could throw in my own spin on the construction to make it really special for my future closet-jewelry-dream-space.
STAGE ONE: MATERIAL SOURCING
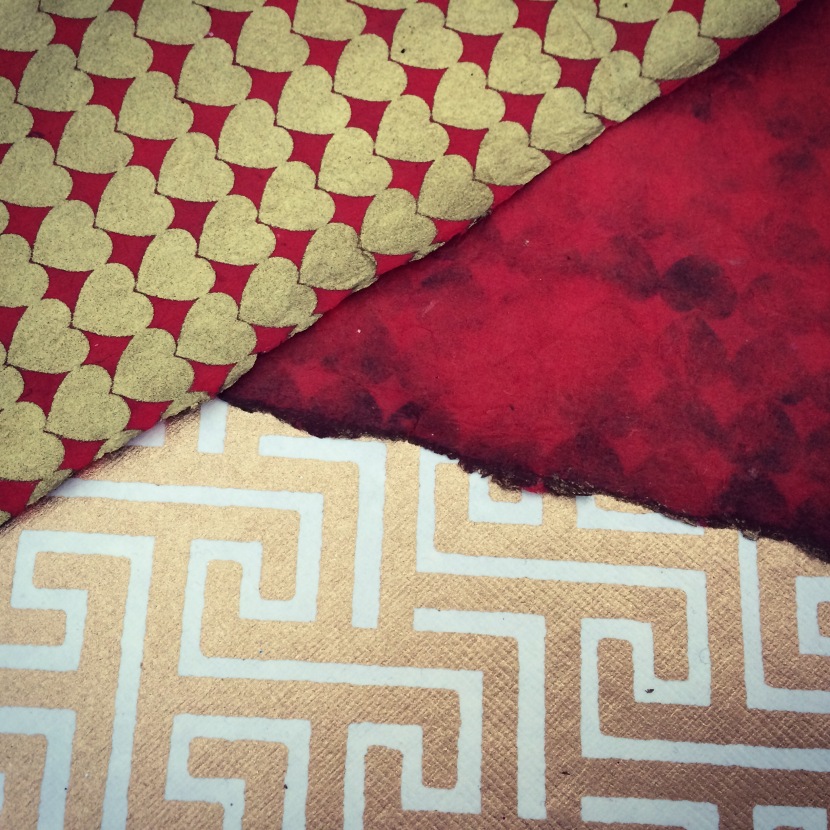
This was an exciting project because I knew I would have to track down most of the materials to get it done – which would mean a trip to my favourite craft store for several items, including gorgeous printed paper. (Not sure why I love it so much, but I always find myself lingering in the paper aisle wishing I could bring everything home!) Going into the store, I had no specific colour scheme or idea in mind for the style of the paper I was looking for, and just ambled around until this striking gold and white sheet popped out at me. It was love at first sight and soon after I found a lovely deep red paper to go with it, featuring bright gold hearts on one side and faded black on the other.
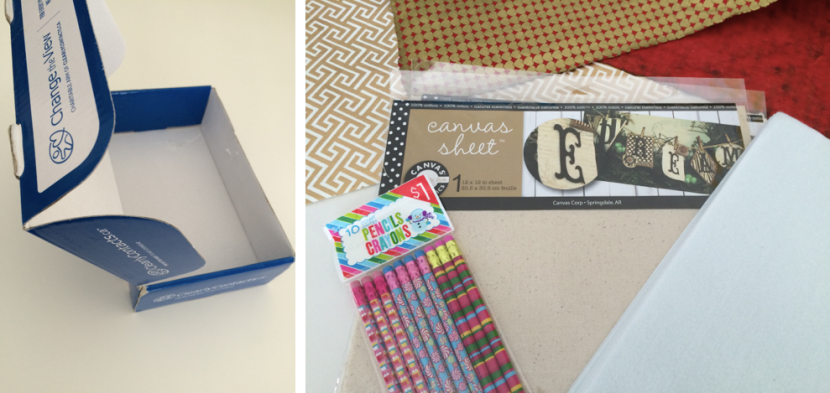
Along with the gilded paper, I bought Japanese washi tape to use as an aid on the inside panels of my box-wrapping mission, a package of white felt to wrap around the pencils, and a couple canvas sheets to cover the felt. (I decided to get the canvas on a whim – all the versions of this project that I found on Pinterest only used felt, but the colours available in the store just didn’t work with my beautiful paper and I thought the canvas would add some extra texture in my treasure box, especially in sharp and grounded contrast to the flashy paper.)
As for the rest of the materials, I picked up a package of pencils in the dollar section of Target a few weeks ago when I first got the idea for this crafty project and all the other essentials were already scattered around the house – my faithful glue gun, a few rolls of double-sided tape, and a perfectly shaped box from my contact lens delivery service. (Thanks, Clearly Contacts! RIP, Canadian Target.)
STAGE TWO: PREPARING THE PENCILS
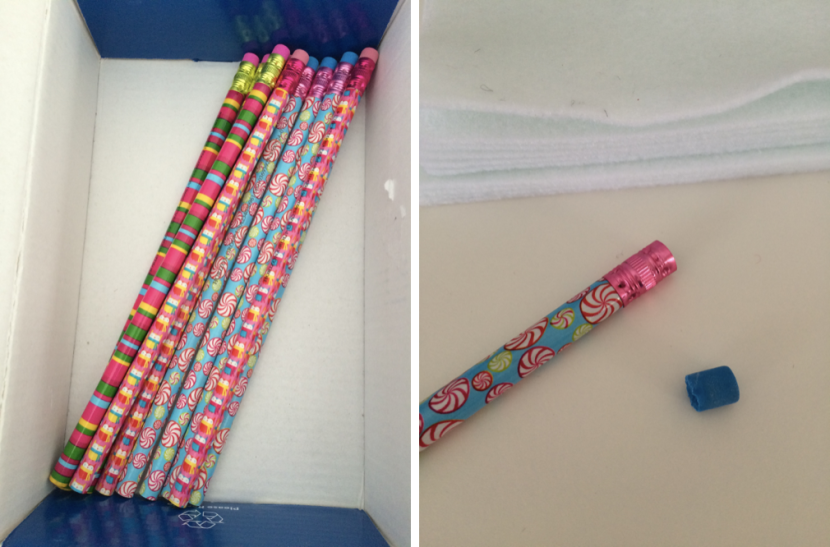
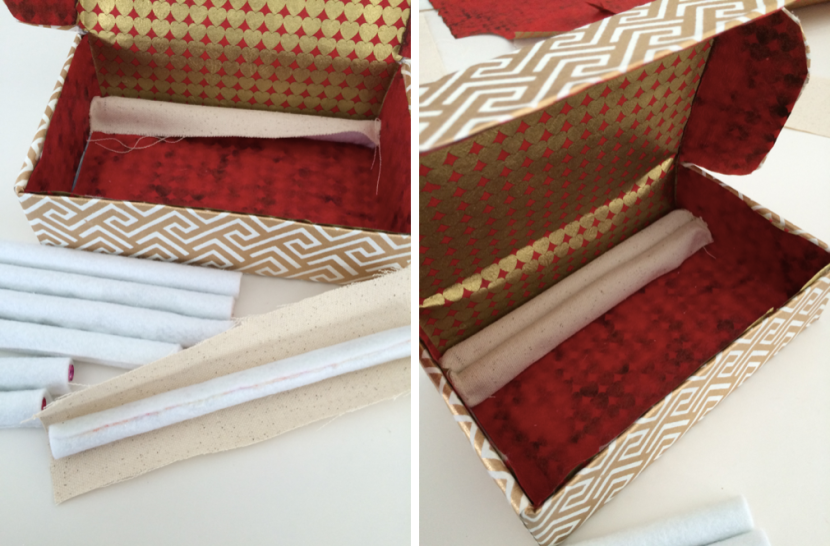
First I took care of wrapping the pencils in the felt. I thought the length of the pencils would fit perfectly in the box but they were a bit too long, so I twisted and pulled the erasers out which was just enough for each of the pencils to fit snugly.
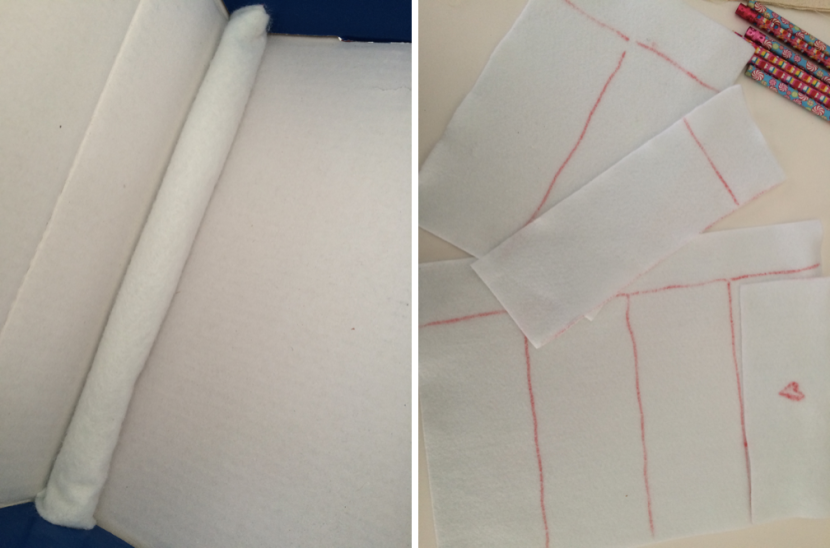
Then I had to figure out how much felt to wrap around each pencil. I cut a sheet of the felt in half and when I wrapped it around the pencil it was way too thick, so I played around and kept cutting the felt back until I had what looked like a good thickness wrapped around the pencil when I tested placing it in the box. Satisfied with the template, I used the first piece of felt to trace several more rectangles so all of the pencils would be relatively close in thickness.
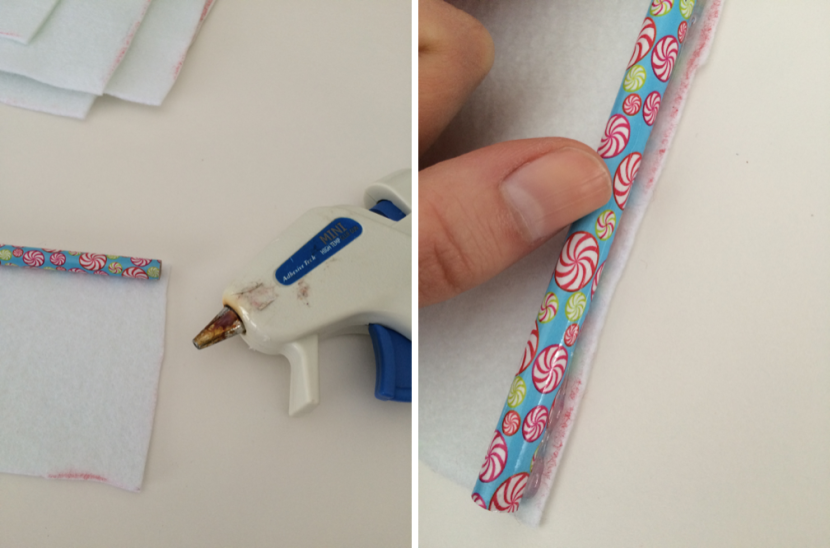
Once everything was cut and ready to go, I got the glue gun heated and started sticking the felt to the pencils. I used a bit of hot glue at each end of the pencil with a third drop in the middle and then pressed the pencil gently onto one edge of the felt until the glue cooled and set.
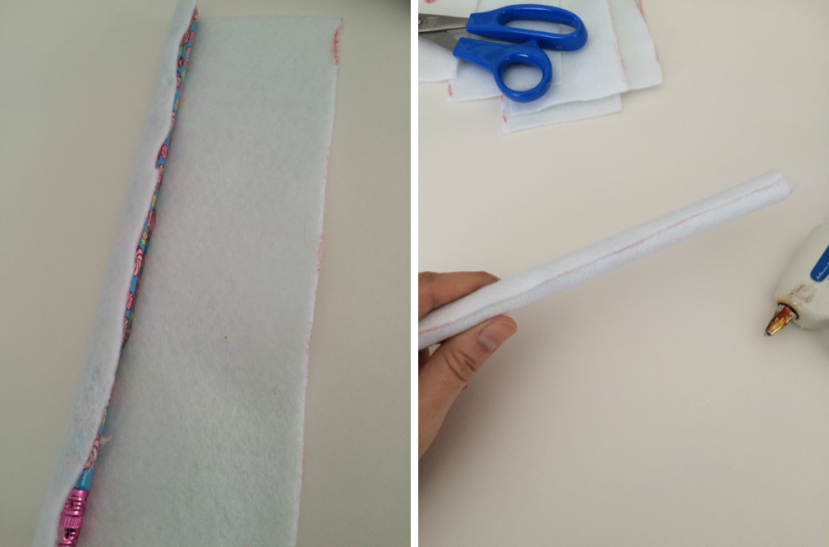
Then I ran a strip of glue along the length of the pencil and rolled it slowly until the glued edge was on top, holding it firmly while the new strip of glue dried and cooled. From there I rolled the pencil all the way to the opposite edge of the felt and then added one last strip of glue along the edge of the pencil, holding the felt along the seam until it was completely dry.
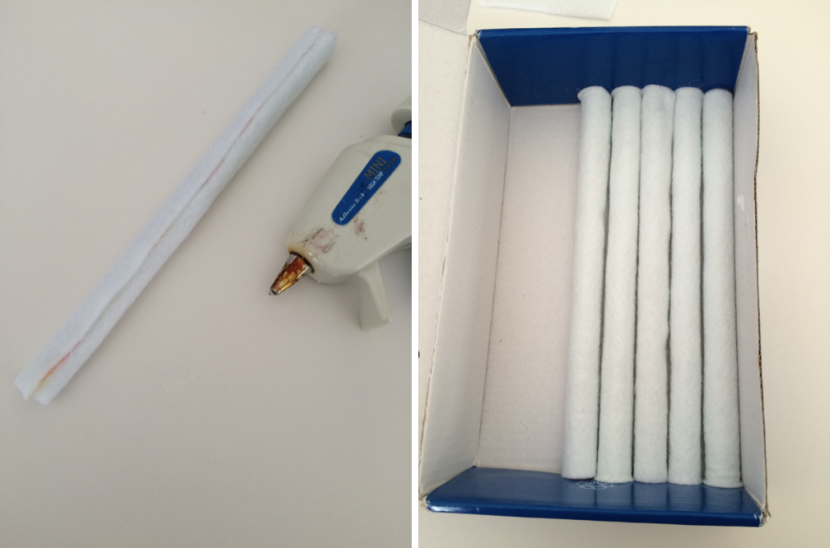
It was hard to tell how many pencils I would be able to fit into the box once they were wrapped with the felt so I started by wrapping and gluing five to test how much space they would take up in the box. It was apparent right away that I would be able to fit at least two or three more, so I ended up wrapping eight pencils in total, which made for a really secure and packed box.
STAGE THREE: BOX WRAPPING
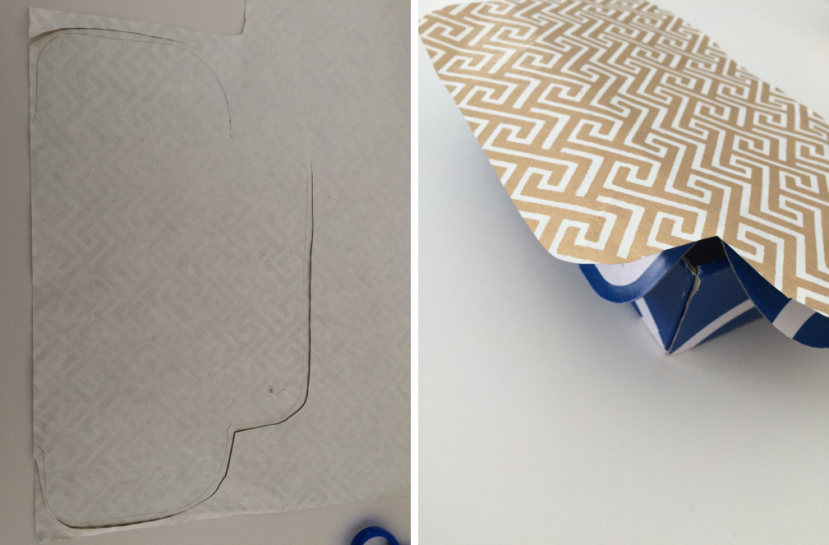
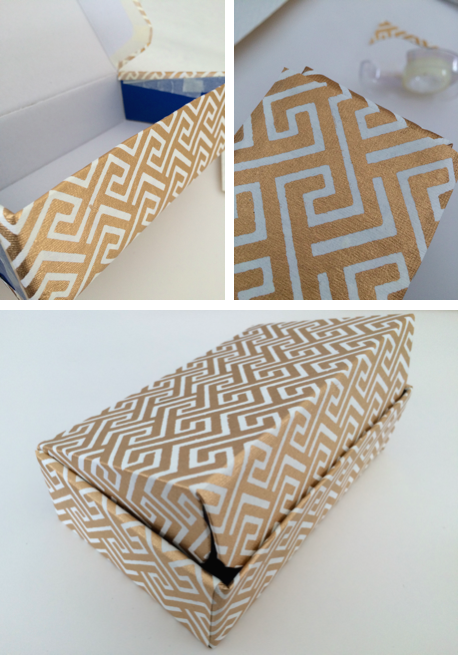
With all the pencils sitting on standby, I moved over to wrapping the box with my beautiful golden paper. I decided to use double-sided tape for this project since it would be far less messier than the hot glue gun and I wanted to make sure that the box didn’t end up with stringy dry glue all over the place. (Lest we forget my arts and crafty organization project of 2013…) I used the box to roughly trace the main pieces and then trimmed to the right size before taping the paper onto the box.
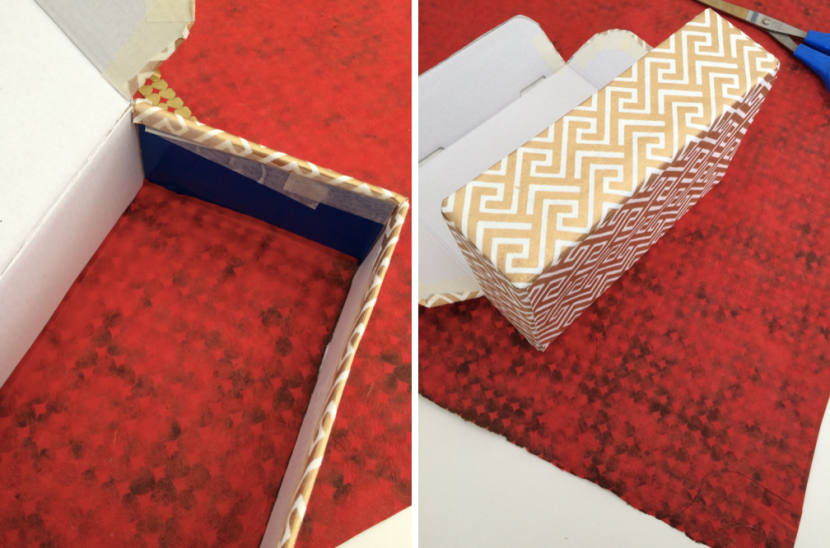
It was a slow process – I was trying to be very meticulous about the paper lining up nicely and preventing showing the blue and cardboard of the original box – but eventually I got it done! I wrapped the outside with the white and gold art-deco paper and then moved onto the red and gold heart paper on the inside of the box.
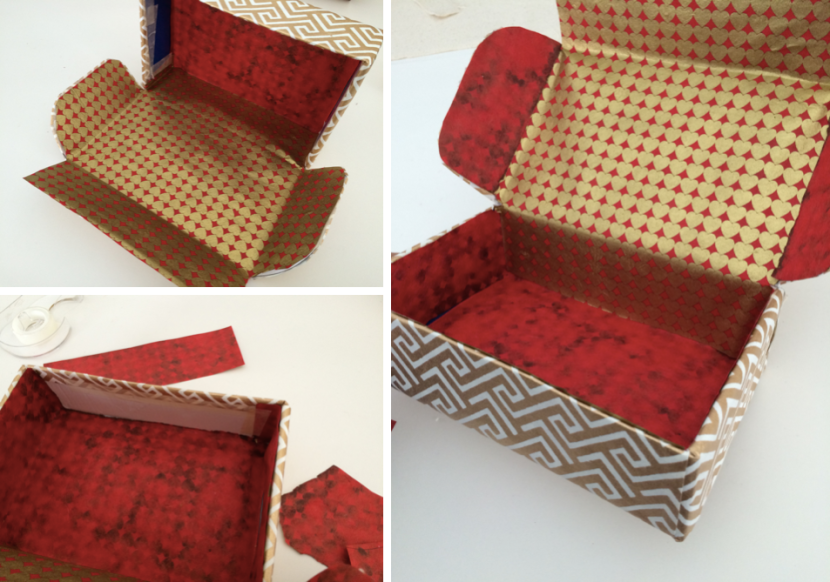
Although the bottom of the box was going to be covered by the canvas pencils, I still secured a square of the red paper on the bottom to start the interior. It won’t be seen, but I know it’s there… Then I roughly traced the top flap and got to cutting and taping.
Honestly, the hardest part of this project was trying to decide what side of the paper to use on the inside of the box – between the shimmering bright gold hearts and the washed out black hearts on the opposite side of the paper, it was a difficult choice. I compromised by mixing in a bit of both, with the gold side running across the largest part of the top flap and the black side used as an accent on the tabs and inner edges of the box.
STAGE FOUR: CANVASING
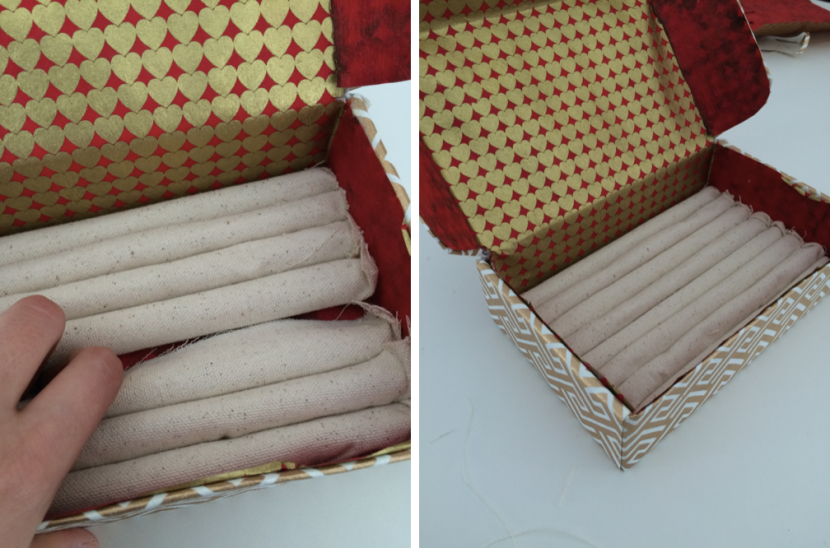
Finally it was time to bring the whole project together with the canvas sheets and felt-wrapped pencils. Originally I had planned to use the glue gun to stick a small amount of canvas to each pencil, but I actually used the last of my glue on the felt! (This feels like a significant moment in my life – I bought that glue gun over 10 years ago and the little bag of glue sticks that came with it have lasted until now.) Though there wasn’t any glue left to secure the canvas, I had a feeling that things would work out anyway because the felt-wrapped pencils were already quite secure in the box when I tried putting them in before wrapping it, so I assumed that the fabric would be held in tightly without a problem.
I settled on cutting just enough canvas to wrap around to the glued seam of the felt so the top of the pencil would be covered, and then added one pencil at a time seam-side down, wrapping the canvas under the pencil as I placed it in the box. With the additional layers of paper taped in the box plus the canvas, it was a really tight fit and I was almost unable to get the eighth pencil into the box; but I made it work by pushing the other pencils against the outer edges of the box and sticking the last pencil in the middle. After picking out some of the loose canvas strings that were sticking out at random, I was done!
STAGE FIVE: BEJEWELLING
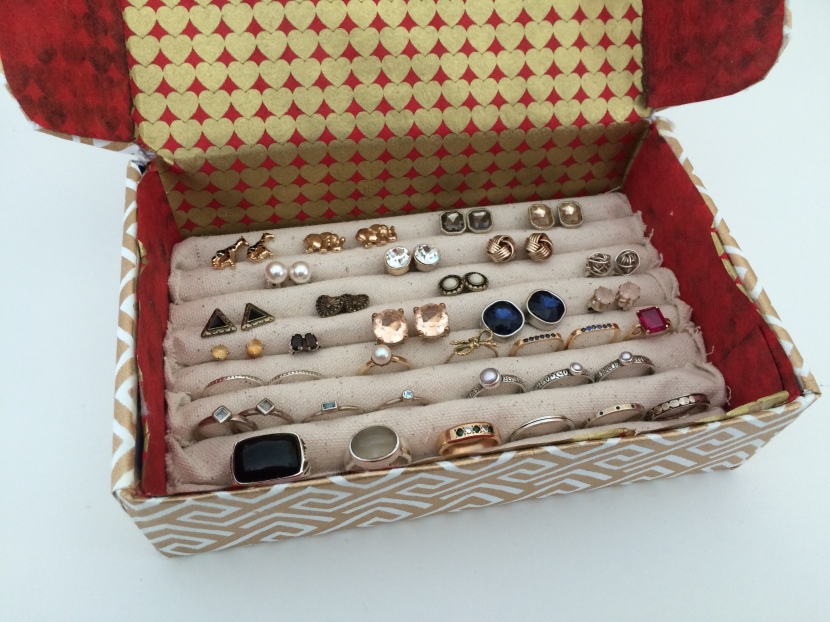
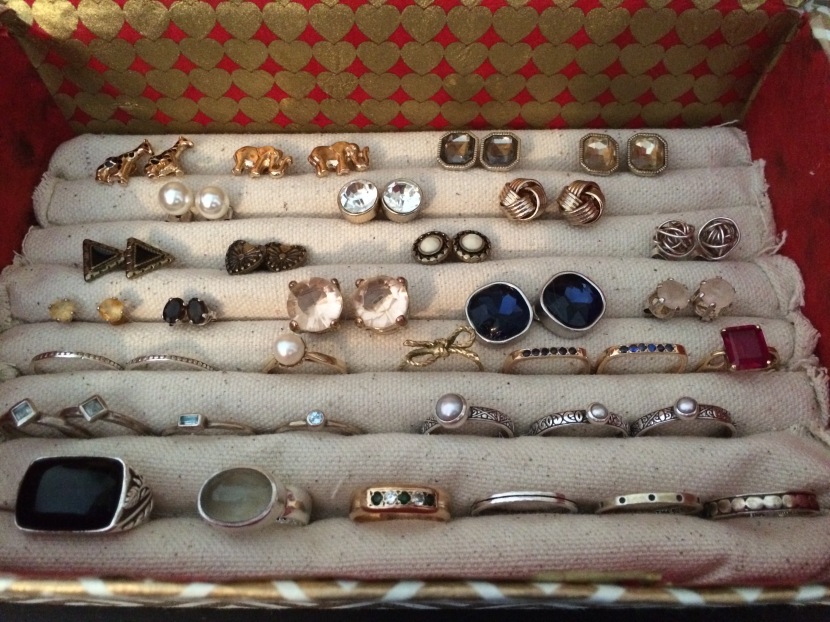
All of my earrings and rings fit perfectly in the jewelry box – I love it! And I’m actually glad that I ran out of glue and didn’t stick the canvas to the pencils, because it will allow me to switch the fabric in the future if I ever find something special that pops out at me. And yes, the final product is a little rough around the edges – the paper is bent and angled in a few spots and I’ve even accidentally torn it a bit more since it has been in use over the last two weeks. But it is also incredibly functional and this beautiful organizational tool has somehow seemed to lower the level of chaos in the house by an incremental percentage, so I’m happy. Plus it’s going to look damn good in my new closet – I’ve got a vision with this treasure box in a starring role.
One comment